User’s manual
The concept
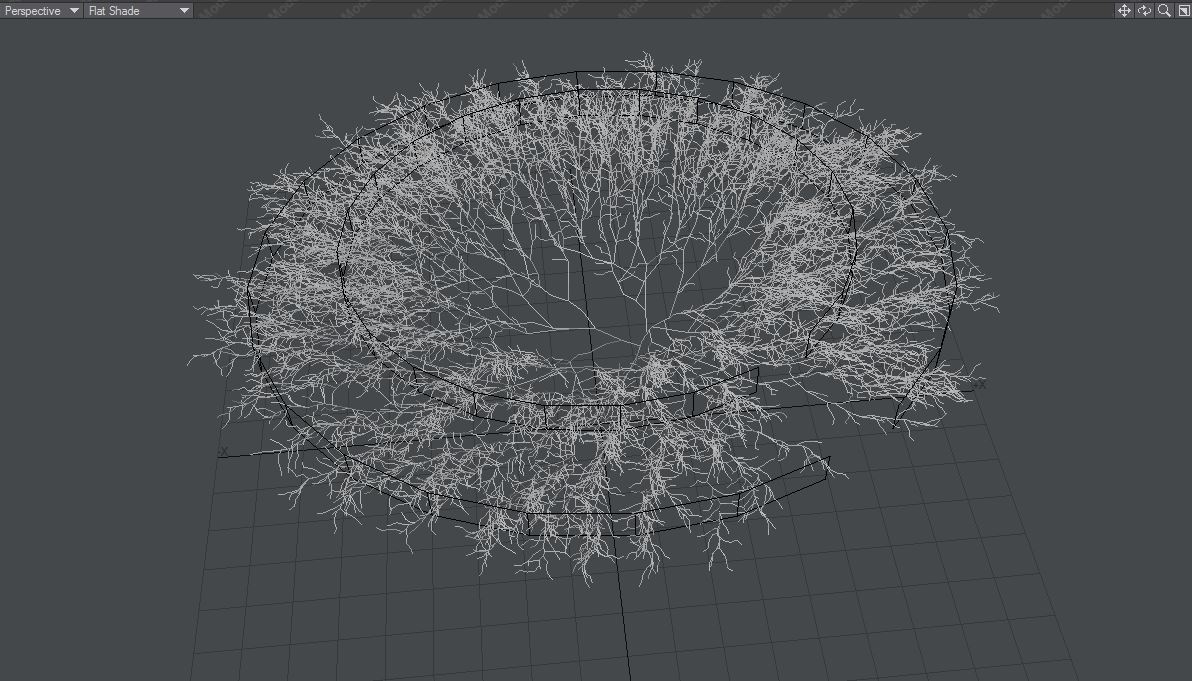
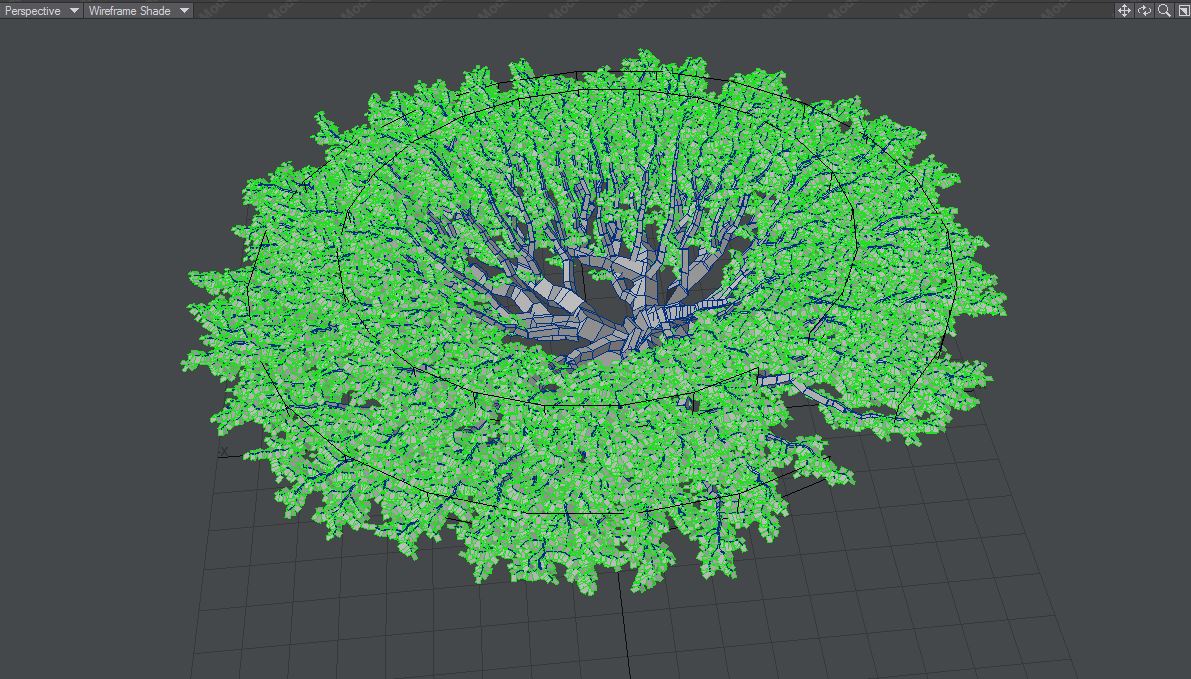
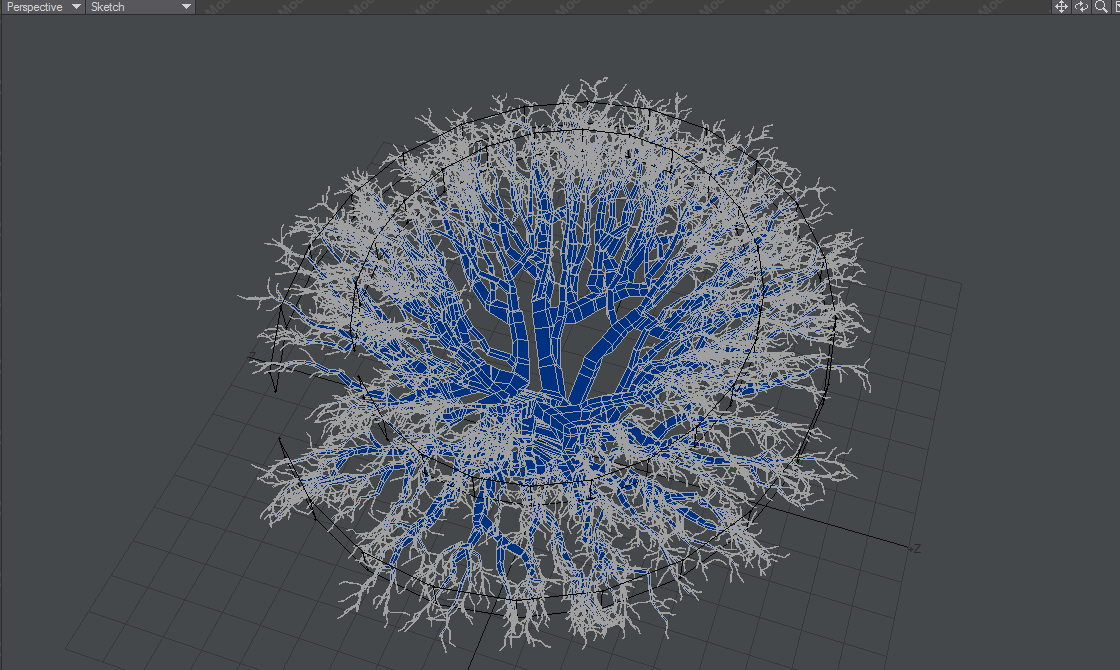
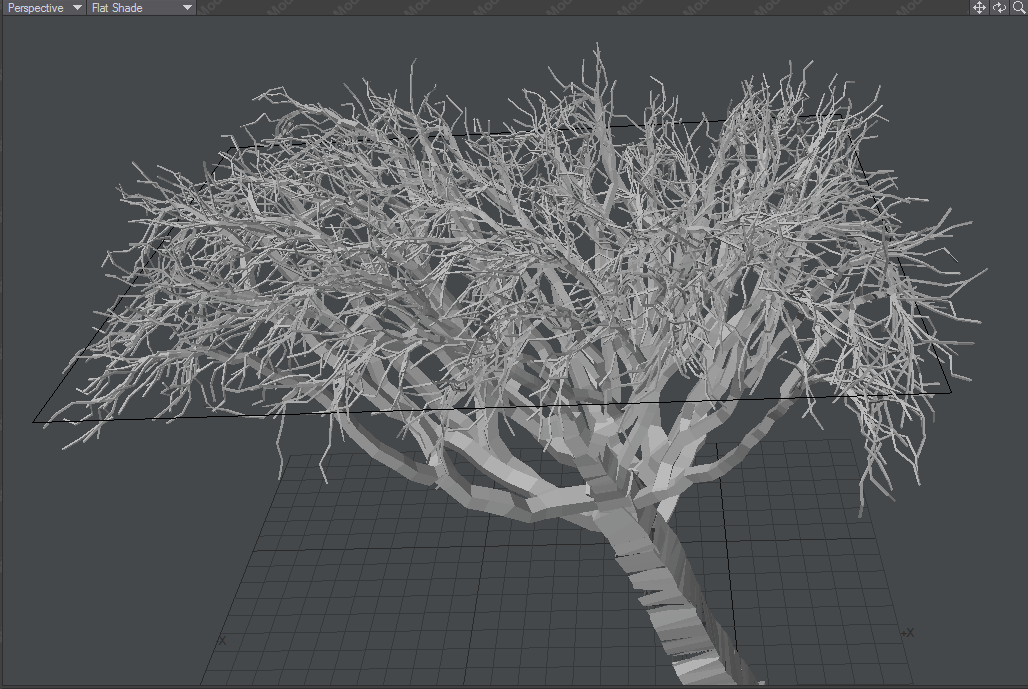
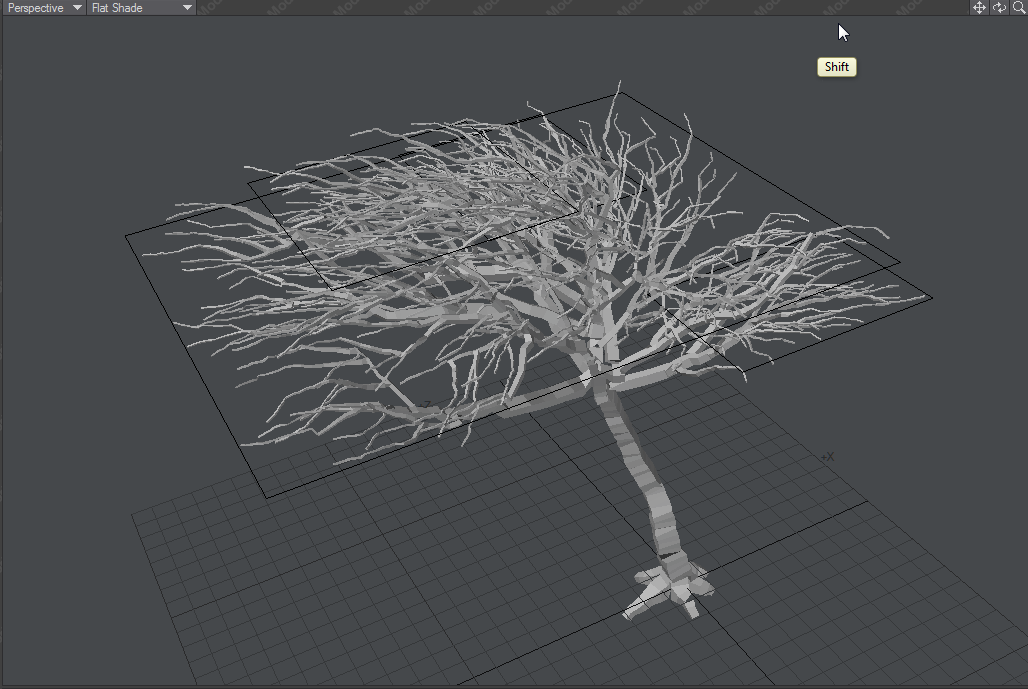
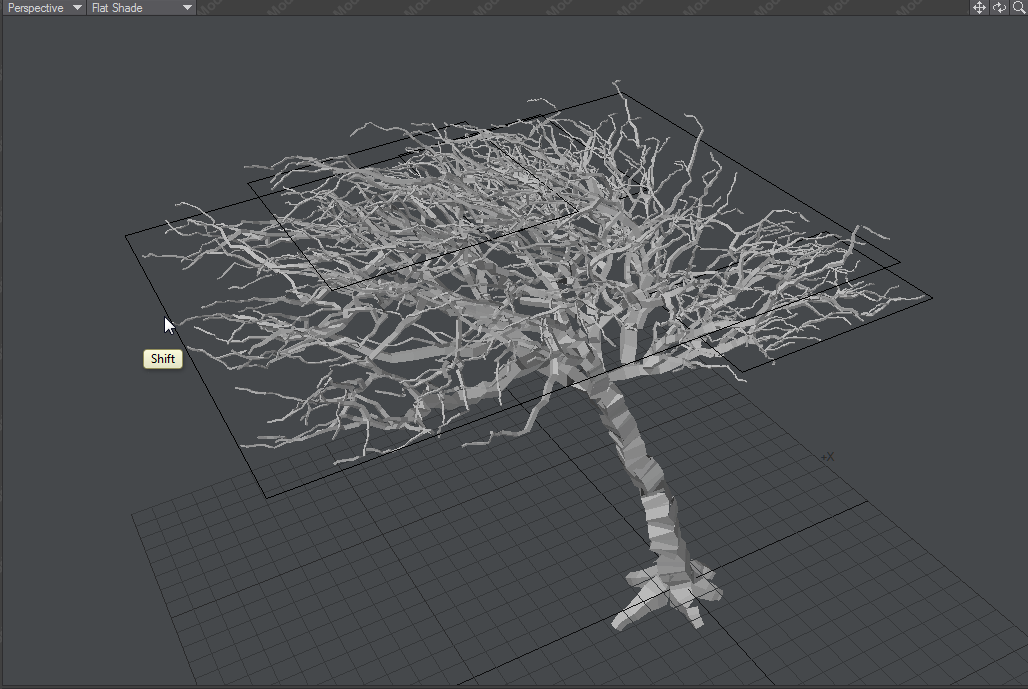
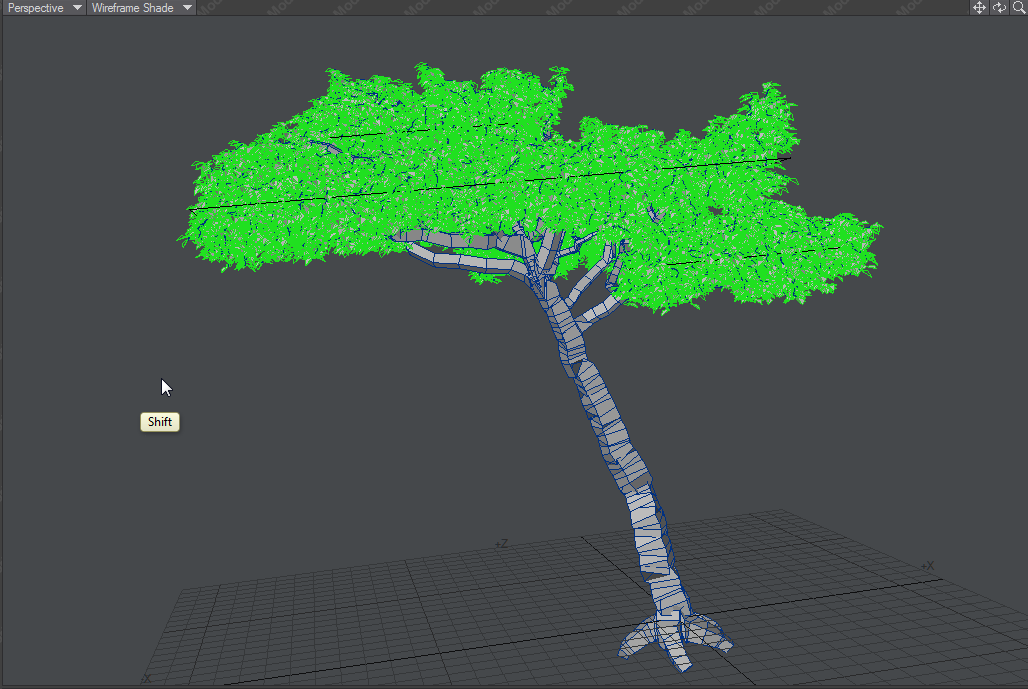
The idea of the plugin is quite simple – it will grow a tree to match some geometry. Any mesh can be used. The tips of the branches are placed on the mesh surface. It always grows the tree from the origin.
Basics
Before you activate the plugin first you need to create some geometry. A simple cube is a reasonable starting point. Alternatively There are some meshes provided in this manual.
two circles mesh
Put the mesh you want to use into a background layer and activate the plugin. It is usually located in ‘Utilities’ menu in additional section. The plugin interface is in ‘numeric panel’. You can open it with a keyboard shortcut ‘n’.
Table of Contents
Display modes
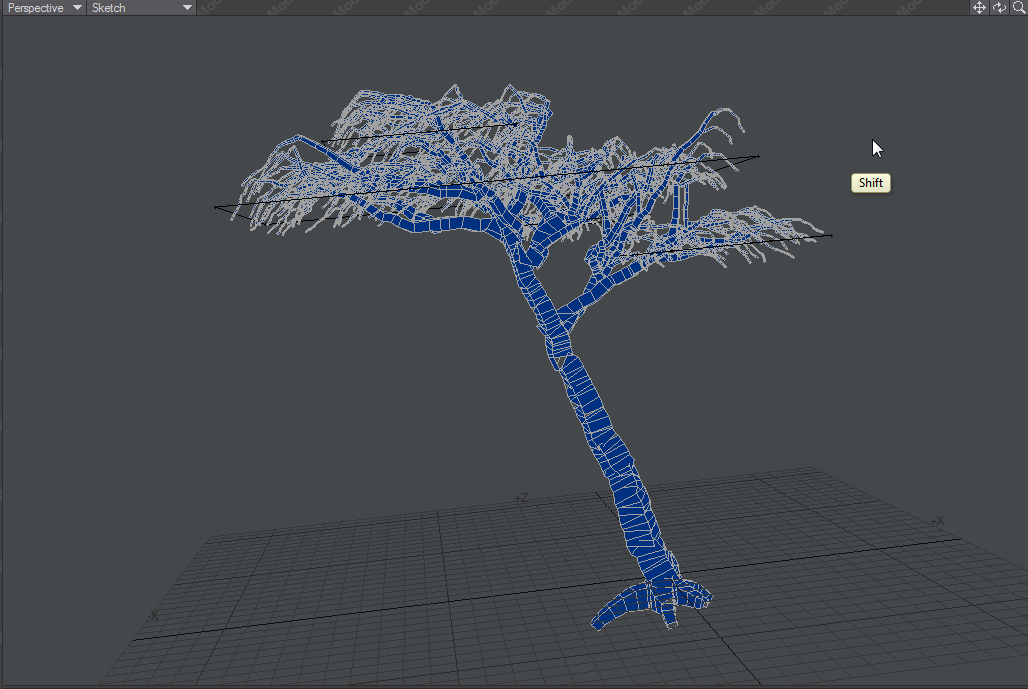
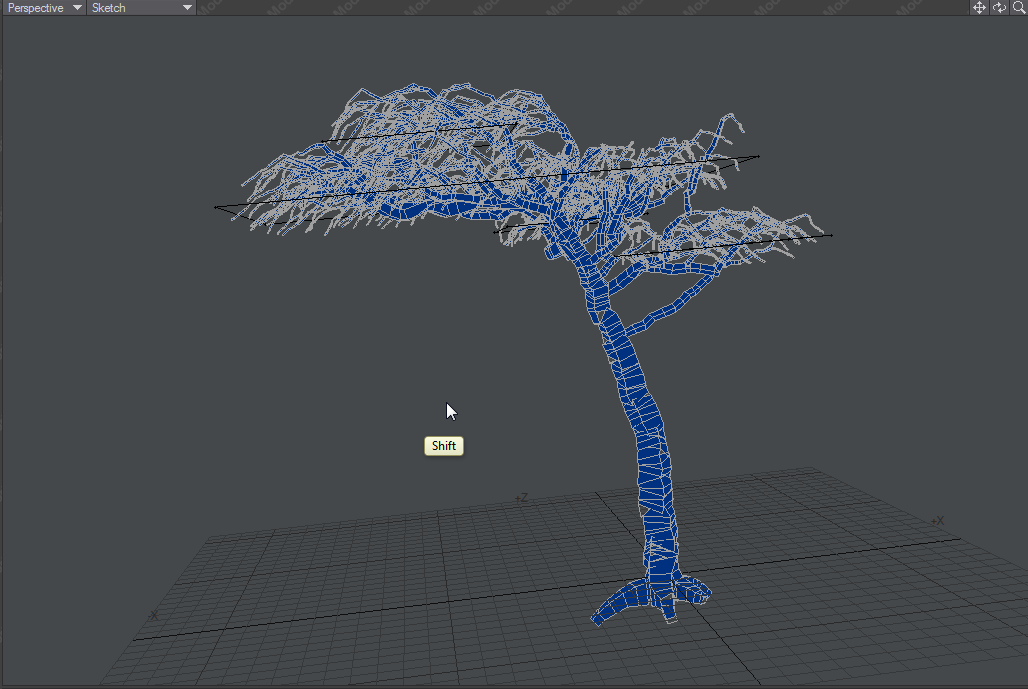
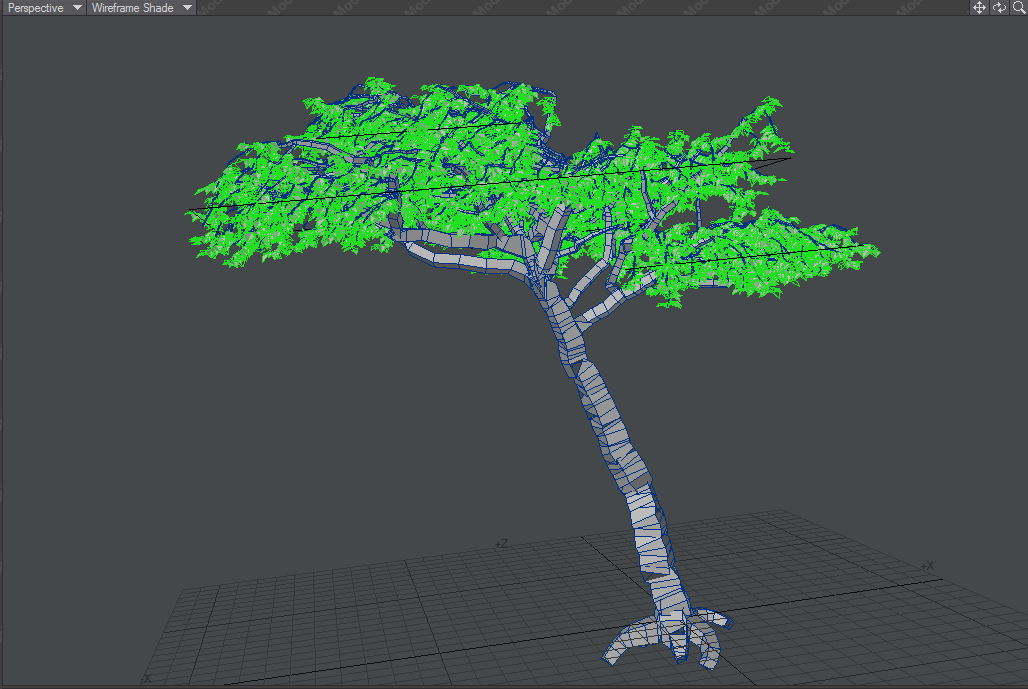
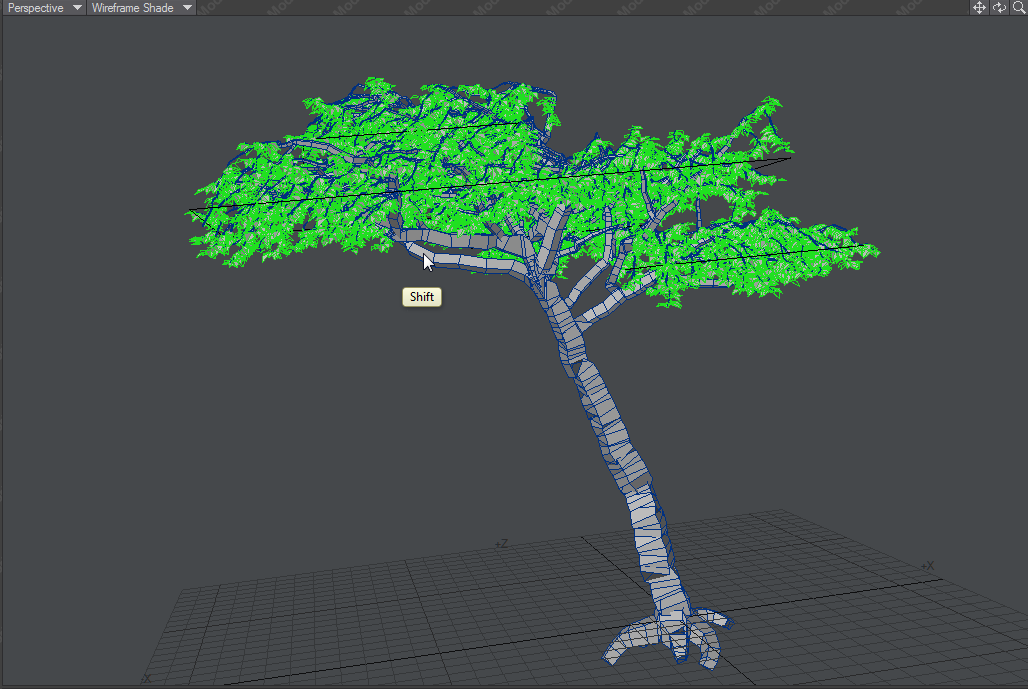
TreesDesigner has three ways of displaying/creating the mesh. The most basic one is called skeleton and is very fast. It displays all branches with no thickness as simple wires to quickly preview the tree structure. This is the only mode available in the DEMO mode. The other two modes create fully usable tree as polygonal mesh or subdivision surfaces.
Interface – Tree tab
The interface is divided into multiple tabs in the order in which they should be tweaked. The first tab deals with the overall shape of the tree and contains the majority of the settings.
The first section deals with the density and structure of the tree.
Branches
The amount of desired main branches of the tree on the mesh surface. It is common to have this setting much higher than the default value. It is possible to have too many however and the algorithm will struggle to cram all of them and connect them together and with the trunk.
Segments and Sub-segments
These are very important settings and probably the hardest to tune correctly. Each branch is made out of segments and it can split only at them. If you have too many branches with not enough segments they will not be able to be joined together and most of them will try to grow from the trunk. It usually ends up looking pretty bad. You should increment segments together with the amount of branches. Subsegments are just additional divisions of the existing segments allowing more connections of the branches. Because each segment grows changing the amount of segments affects the look of the tree. Adding more subsegments however only allows more branch connections without changing the overall growth of them.
8/2 |
16/2 |
8/4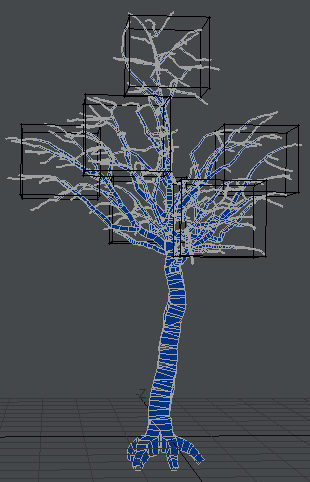 |
Bias
The last setting in the top section controls the distribution of the segments. The higher the value the more segments is pushed towards the tips of the branches. If you find that the segments at the tips are too short and crammed together lower this settings. It has a pretty big impact on how the branches are connected though – remember that they are only connected at the joints of the segments. In most cases you want more segments at the tips where there are a lot of branches.
Below is a difference between bias 2 and 4. You can see how the segments close to the trunk get much longer with the increased bias.
Branch tip jitter
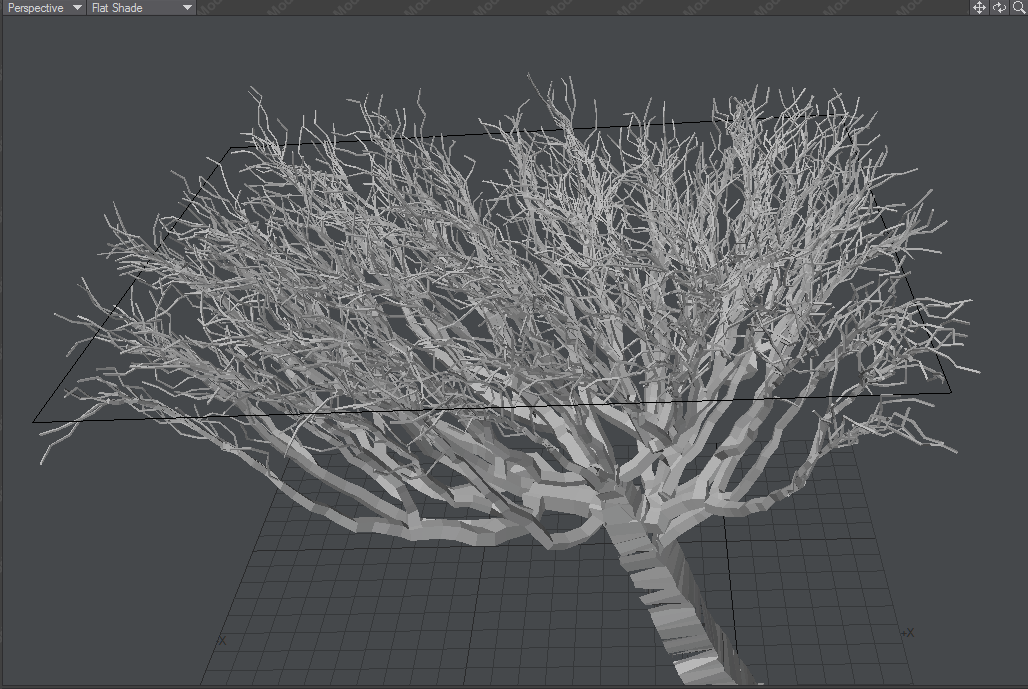
The plugin places all the branch tips on the mesh you provided. It is fun to create box shaped trees but usually they do not look very natural. This setting allows you to move the tips randomly across the surface. The higher the setting the less the tree conforms to the shape of your mesh.
On the image below you can compare the difference between small and large amount of jitter.
Tree centre and centre variation
TreesDesigner has a notion of tree centre. This setting is based on the observation of the real species that tend to have branches concentrated at some part of their trunks. IT controls the height on the trunk of where the branches want to grow from. Obviously on one end their growth is dictated by the input mesh but on the other is influenced by the trunk position. The lower the value the shorter the trunk will become.
higher and lower tree centre:
 |
 |
Normals influence
The input geometry should have surface normals pointed outwards. The branches connect to its surface at the backs of the faces and try to conform to the surface normals at the tips. It is possible to set this setting to negative values to force the branches to grow the other direction. If you force the branches to grow to the outside of the mesh too much (with flipped normals) they may have difficulty to reach that point from the trunk and just grow from the ground nearby. It is not recommended to have flipped normals or negative normal influence setting for solid volumes as input meshes.
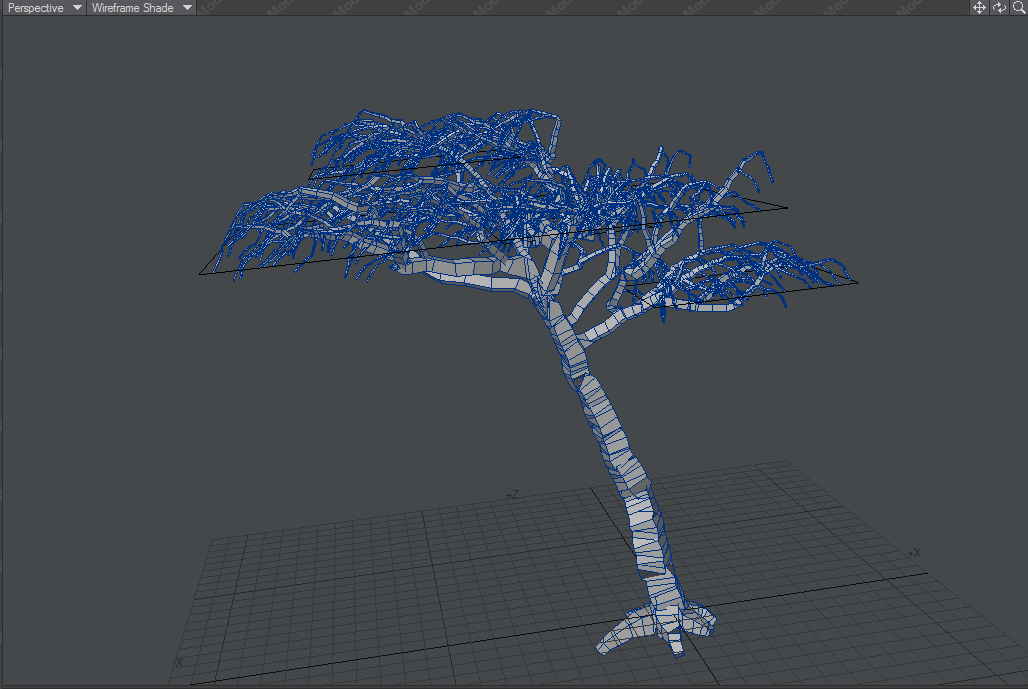
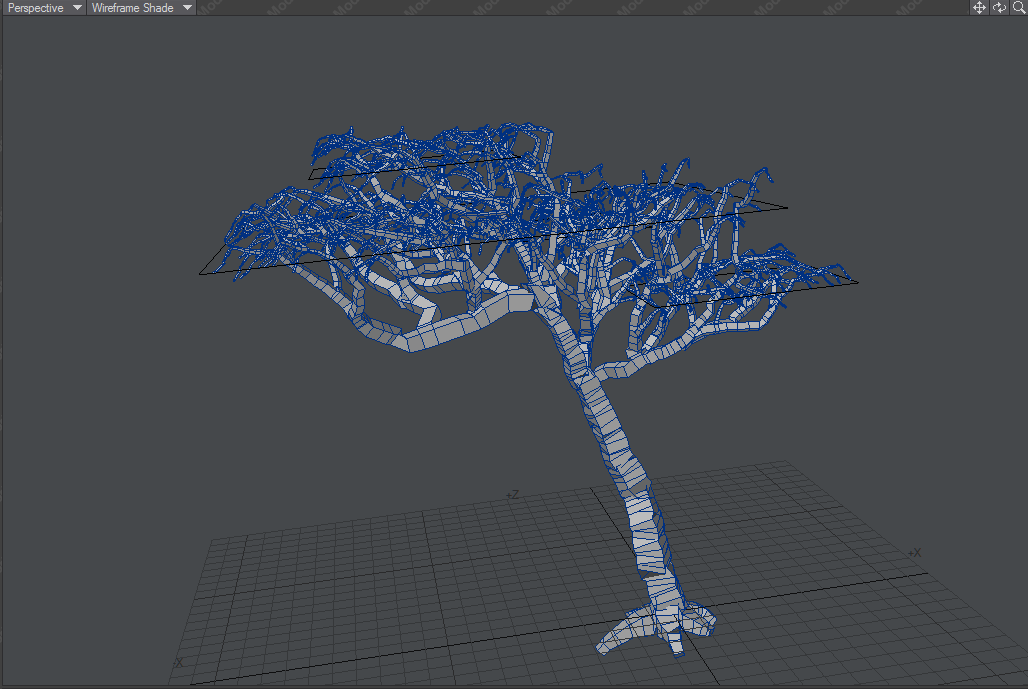
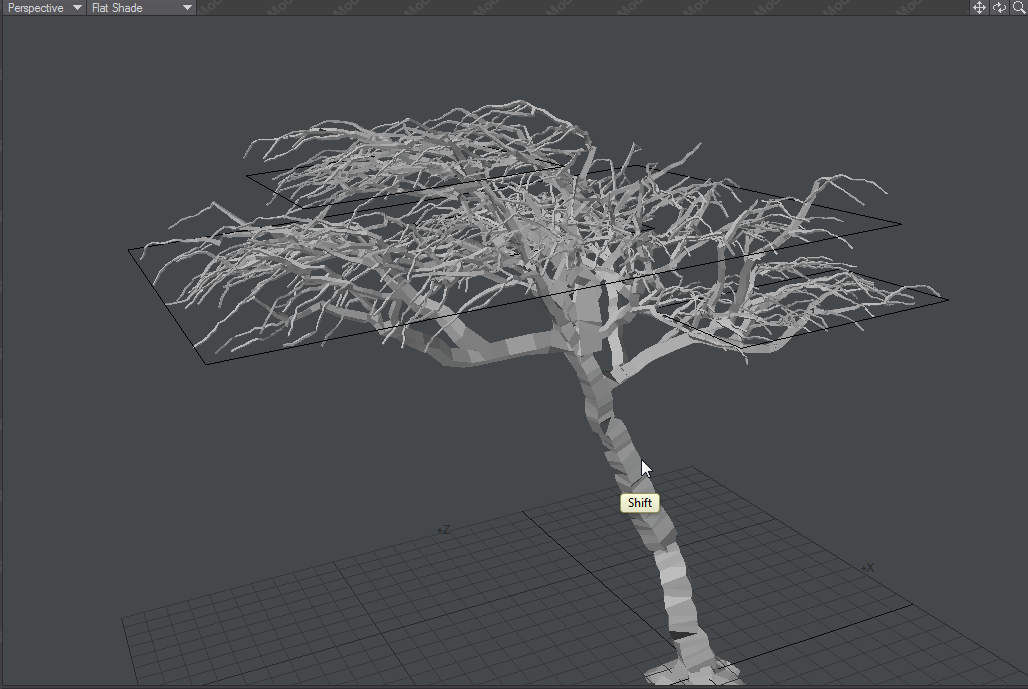
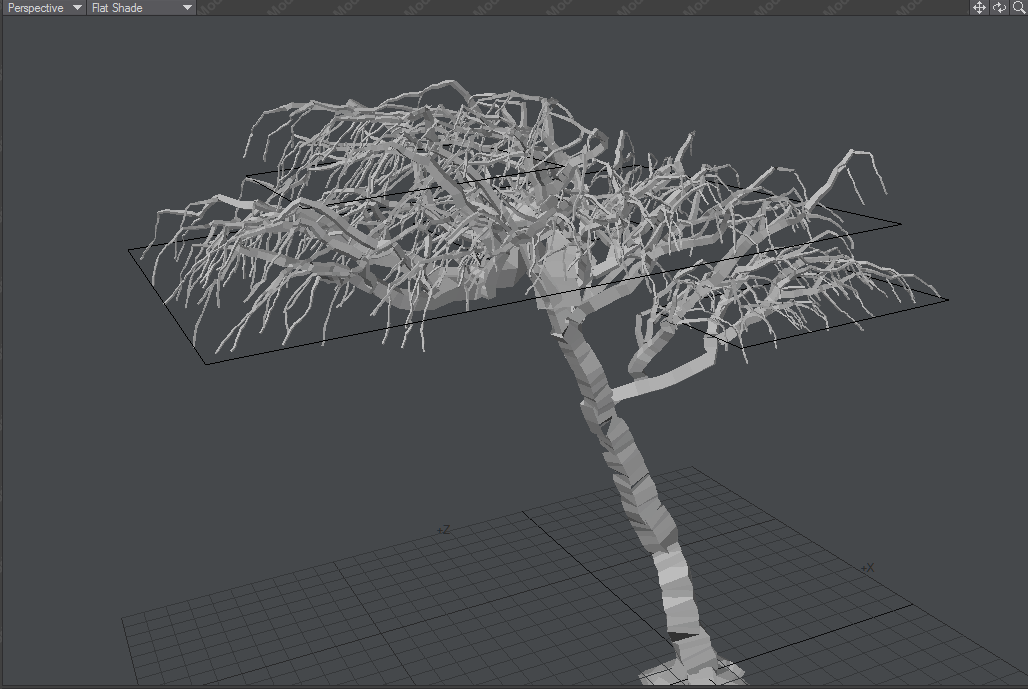
Below is an example tree grown from a single horizontal polygon with positive and negative normals influence. This example demonstrates how this feature affects the shape and of the tree.
Branch end and start split
Downloads for this section:
- The test simple mesh – manual_three_planes – used in below examples.
- Preset for the plugin – three_planes
These two controls set limits on branch splitting on both ends. In some cases you may want to have clean long branches at their tips (fresh young growth in the spring). To accomplish that you need to increase the branch split end value to stop them from forking there.
Branch end split set to 0% and 33%
Branch split start is a fairly weird setting to be honest. It doesn’t behave in a similar way to the other one but affect branch splitting on the other end mostly so it is grouped in the same category.
Below branch split start set to 10% and 40%.
Branch end and start bend
This set of controls allows you to manipulate the shape of branches. Without any bend a branch will grow from the trunk to the tip on the mesh surface in roughly straight line (affected by some of the settings described before like normal influence etc). The bend forces it to arc nicely on both ends. Different tree specimens have branches in different shapes, some of them have the tips hanging down, some of the grow up towards the sun etc. This allows you to change this feature and still keep the tips of the branches on your mesh. The default settings create branches with S curve shape which is the most common.
On the example below you can see how the branches at their tips bend more when the setting is increased.
Branch crookedness
This setting allow the branches to grown in an irregular fashion. The higher the more crooked they are.
Trunks
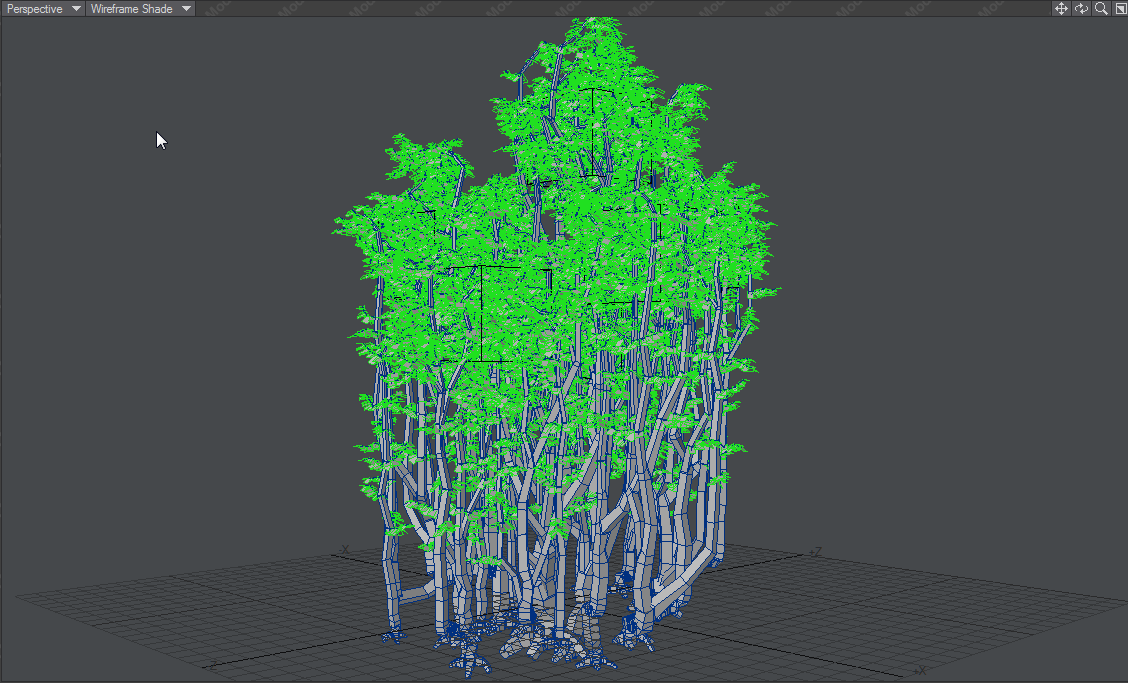
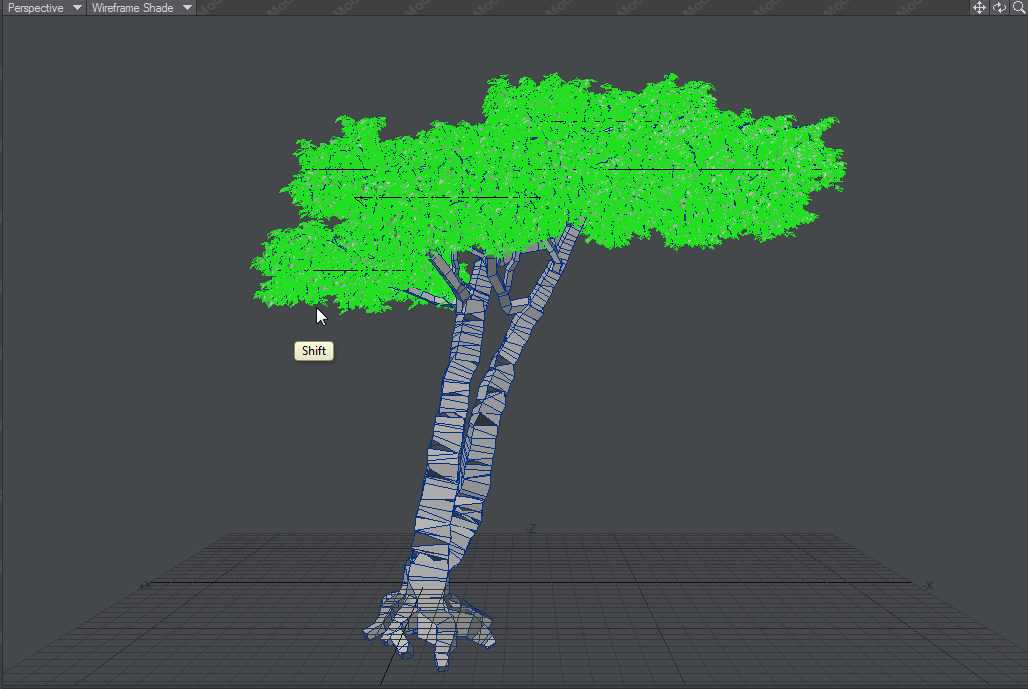
Some of the trees grow very close together forming one shape together. Instead of creating multiple separate trees and splitting the the input mesh into chunks TreesDesigner allows to grow them all at once from one input mesh. The plugin will separate their branches based on their distances from the trunks.
two trunk preset – two trunks
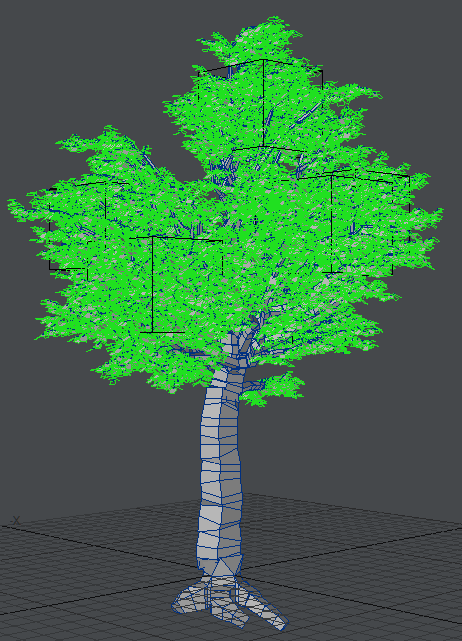
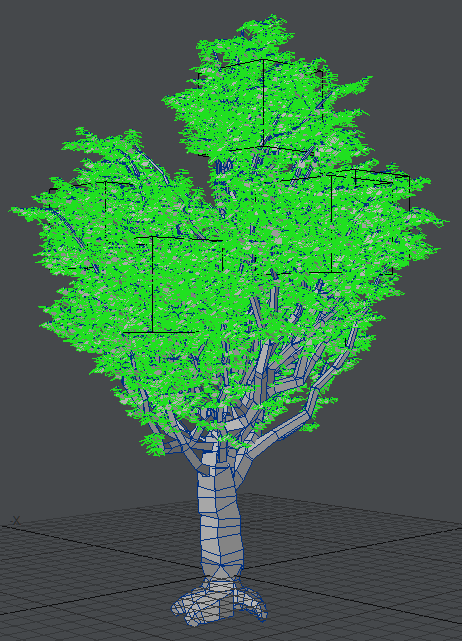
Trunk type
There are currently two types of trunk available. A think one for younger species and a thick one for older one. They grow differently and make the trees look different.
Trunk bend
Like in the branch case this setting allows to arc the trunk. Negative values bend it the other way. Value of zero results in fairly straight one.
Below example shows the difference between 0 and 2.0
Trunk crookedness
Similar to branch setting explained above. The setting makes the trunk grow in irregular fashion.
Branch and trunk thickness
The thickness of the trunk and branches. TreesDesigner thickness attribute is not the final desired one. It is more like amount of growth allowed per unit of length. In most cases those settings do not need to be changed by much as the value is related to the overall tree size.
Branch tip thickness
This value is the absolute tip thickness of a branch. It will not be scaled accordingly to the tree size like the above ones.
Interface – Twig tab
The first tab controls the main branches and structure of the tree. In nature on the main branches grow smaller twigs every year. Some of them will become part of the main tree structure over time but there is always a lot of fresh ones. TreesDesigner allows to grow many types of common twigs. This process doesn’t affect the overall shape of the tree created so far. It only add complexity and supporting structures for the leaves.
Type
The style of twigs can really affect the final look of the tree. Some trees have long willowy hanging twigs, some others only grow them horizontally. There is usually some detectable pattern in the way they grow. Sometimes they just grow randomly in all directions to capture the light.
- up – twigs grow upwards
- down – twigs hang down
- horizontal – twigs grow horizontally to the sides of branches
- branch – twigs follow branch direction
- random – all the types mixed randomly
- side – twigs grow to the sides of branches
Range
TreesDesigner tries to put emphasis on the outside of the tree as this is the part we usually see. With the range setting you can decide how far inside of the tree the twigs will extend. Small values will only add twigs to the very tips of the branches. 100% will grow them on the entire branches. For very dense trees smaller values work good and you and up with lighter meshes that ho not have much geometry on the inside part of the tree. For trees with lesser leaf coverage you may need to have more twigs inside them to make them dense.
5% and 50% range:

Coverage
This determines the amount of twigs you get. With 100% coverage you will get one twig per segment of a branch. If you need more twigs than that you will have to add more segments or sub-segments to the tree.
10% and 90% coverage:
Segments
Like in the branch section this control allows you to set the amount of divisions along a twig. Keep in mind that the leaves will grow on each section so for long twigs you need more segments to cover them with leaves.
Length type
The last three settings control the length of twigs. There are two different ways to grow them.
proportional – will make twigs length proportional to branch segments they grow from. The longer the segment the longer the twig. This allows you to have shorter (younger) twigs on the tips of the branches.
constant – all twigs will have the same fixed length. This works surprisingly well and looks very natural. In real life most of the twigs start to grow at the same time in spring and their growth rate is similar.
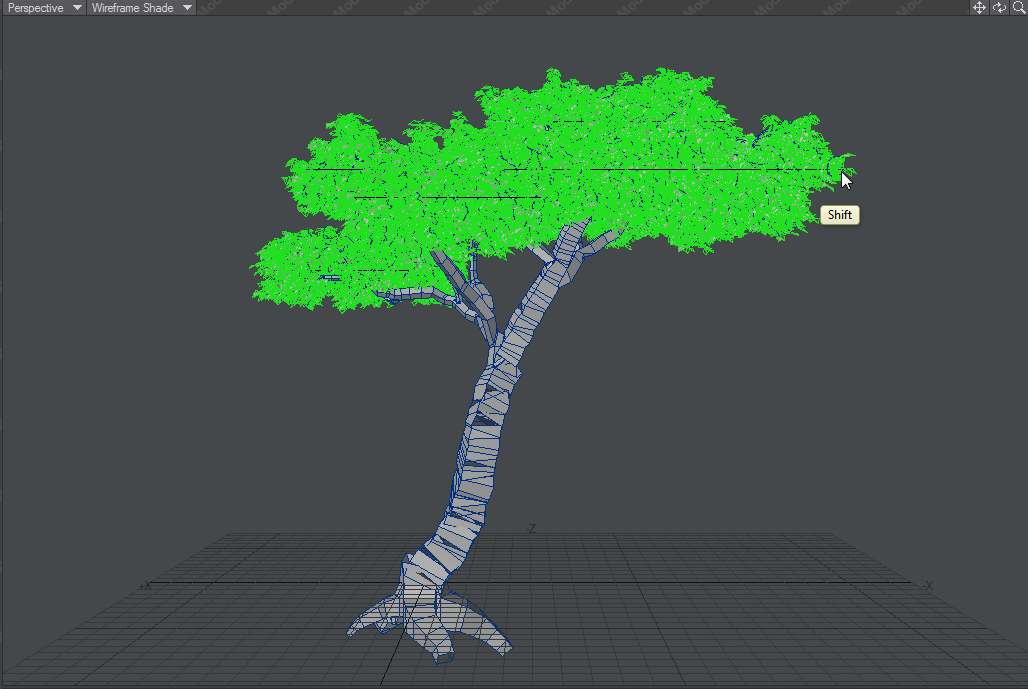
Interface – Leaf tab
Once we have a tree with twigs on it we can cover it with leaves. It is good to hide all the leaves during the process of tuning the tree shape as usually there is hundreds of thousands of them and they impact interactivity of the plugin.
Leaf Shape
There is a variety of simple leaf shapes to choose from depending on the kind of species you want to make and the distance it will be seen from. If you are planning on using displacement maps for leaves usually single poly leaves are good enough.
Density
When set to 1 the plugin will create one leaf per twig segment. If you have very little segments on long twigs and need to cover them more densely this setting allows you to grow more leaves in between.
Leaf growth
Currently there are two types of leaves growth possible. Symmetrical – which grows leaves in pairs on both side of a twig and staggered that grows every second one on the opposite side. This will not affect all the twigs equally. Twigs that grow vertically up or down follow a bit different growth rules and usually have leaves distributed on all sides like in real life.
Leaf length, width and size
length and width settings allow to precisely set the average leaf size for the plant. For fine visual tuning there is a third settings available that scales a leaf proportionally. It is much easier than trying to deal with width and length together to adjust the size a bit.
Size tip
this setting scales the leaves closer to the tip of a twig allowing to have smaller (younger) leaves there.
Randomness
it controls how much leaves can vary in size. Usually 10% is more than enough to get realistic variety.
Out
TreesDesigner tries to optimise trees to make them look best from the outside. This setting allows you to turn the leaves towards the outside to make the tree look denser and less see-through. It is also what real plants do – they turn the leaves to catch as much light as possible.
Hang
This corresponds to the effect of gravity on the leaves. The higher the more downwards the leaves will point. The negative values are perfectly valid to make leaves point up.
Tip hang
a separate “gravity” for the leaves growing close to the tips. Quite often this should be set to a lesser value than the overall gravity or even to a negative value to have the new growth point upwards.
Randomness
This is a second randomness setting in this section. It controls how much the hang settings can differ from the values above. Natural plants are often quite messy so it is normal to have this value quite high.
Interface – Advanced tab
This tab contains settings rarely used. Some of them are kept for the compatibility with older versions of treesDesigner.
Trunk influence
By default the trunk shape and position has fairly strong influence on how the branches grow near it and it lessens farther away from it. In some types of plants it may be desired to have it fully affecting the or not at all.
Branch type
This setting allows to control how the branches split. TypeA setting allows them to split almost in any direction. TypeB tries to keep them growing on similar height. If you find that you have some branches crossing between clumps typeB may fix that problem.
Roots
the roots are mostly created to shape the bottom of the trunk a bit better. They were never intended to be a feature of the tool so the controls are fairly limited and self explanatory
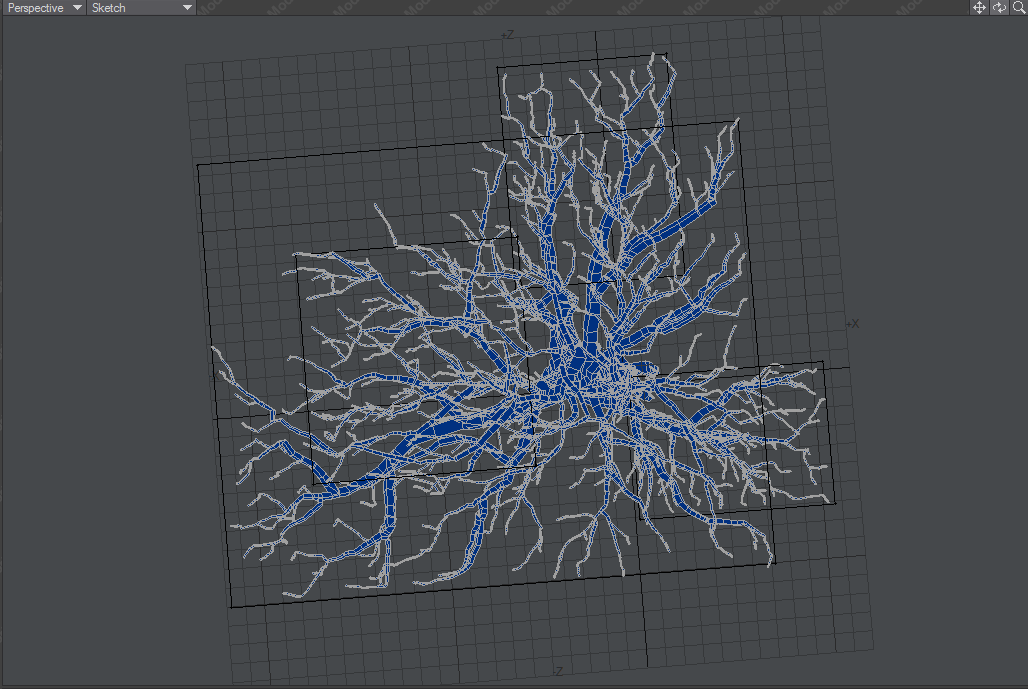
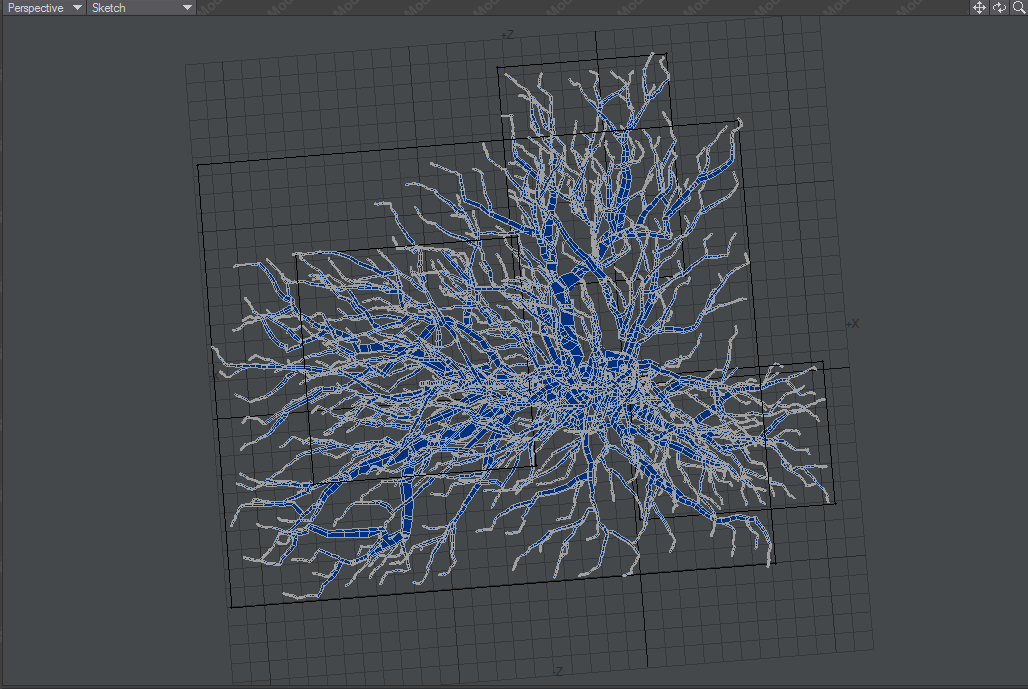
Distribution power, iterations
The tips of the branches are distributed uniformly over the input mesh. Distribution power controls the uniformity of it. The lower the value to less uniform the distribution. The iterations has similar effect but fundamentally works in very different way. It sets the limit on amount of tries allowed to hit the perfect distribution. With high value the initial step of calculating tip positions may get very slow.
Weightmaps
The plugin generates two weightmaps to help with shading and animation of trees.
The first one called range covers the area where twigs and leaves grow. The hardness sets the blurriness of the edge of that range.
The second one sets the value of the weightmap to the thickness of a branch and it is normalised to the thickest one. The normalisation can be controlled with the last setting in this section.
The weightmaps are very useful for texturing and allow you to blend multiple textures depending on branches thickness (age). The main purpose was of them was however to help with rigging and animating of trees. The weigtmaps allow to control the stiffness of the branches and their response to external forces.
Tips and tricks
separating tree components into layers
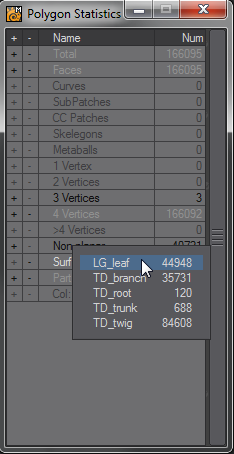
quite often it is handy to have at least leaves on a separate layer from the branches. Modeler and treesDesigner make this task very easy. The plugin tags all different parts of the tree and assigns separate materials to them. Simply open statistics panel (‘w’ from keyboard), switch to polygon mode and select by tag or material. Once desired parts are selected cut and paste them to another layer.
Please keep in mind that some parts of the tree are smoothly joined together. If you separate branches from the trunk or twigs from the branches this way they will not smooth correctly when the mesh is converted to subdivision surfaces.
texturing leaves
TreesDesigner creates two UV maps for leaves. One has all leaves stacked on the entire tile – meaning each leaf will have exactly the same texture. The second one has a grid of leaves side by side. The grid contsains 9 leaves in 3×3 layout allowing you to have 9 different textures and opacity maps. I found this size to be a good compromise between enough variety and amount of work. Larger grids require too many unique textures to be created with not much visual benefits.
texturing trunk and branches
All branches and the trunk have normalised UVs. This means that the texture will not stretch on longer branches or get compressed on shorter ones. Painting a long texture to cover the entire length of a branch may be difficult and time consuming. To make texturing easier treesDesigner provides some weightmaps to allow you to blend multiple tileable textures. The most simple solution is to have one tileable texture for the bark and thicker parts of the tree and another one for the younger and smoother growth. These two textures can be then blended together using treesDesigner’s Td_thick weightmap that is mapped to the thickness of the branches.
Exporting trees to other apps
fbx
Fbx format seems to be the best one to take trees from LightWave to other apps like Maya. It carries through all UV maps and layers. At the moment it seems that weightmaps are not supported. To help with this problem TreesDesigner generates utility UV map that doesn’t look correct but corresponds to weightmap values and can be used with simple U or V gradients in the same way.
obj
this is the most popular way of exporting models from LightWave and the format is supported by most of the applications. This format however is very old and limited. First of all you can only export one layer at a time and with only one UV. You actually need to select the UVs that you want exported in LightWave interface otherwise it exports just the mesh.
Troubleshooting
Not all combinations of settings and/or shapes will produce great looking trees. The algorithm tries hard to fit a tree into user’s input shape and obey the settings but sometimes it is just not possible to calculate realistically looking results and the resulting tree is messy and unnatural. In this section I will show a few examples of some more common problems and ways to fix them.